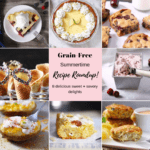
Grain-Free Summer Round-Up!
This Summertime Roundup includes eight of our most favorite and classic Grain-Free recipes. I mean, who doesn’t love a good waffle cone?! And there are a couple of delicious savory recipes in the mix that are guaranteed to knock your socks off.

Hi friends!🌤I wanted to gather together our very favorite grain-free summertime recipes for you–it’s always so much easier when they’re all in one place! We have here 6 scrumptious desserts as well as 2 savory recipes–crab cakes + twice baked potatoes–these pair so beautifully together, I can’t even tell you. Top that dinner off with a slice of berry or key lime pie and you are good to go!! You can find all the recipes below this post, I’ve also provided links with each image so you can go straight to that post if you prefer. Enjoy!
We’re crazy for these paleo cherry chocolate blondies for so many reasons. First of all, they are just ooey gooey deliciousness, but they’re also a breeze to make–no hassle! Perfect dessert if you’re crunched for time.

I’m a sucker for anything that is both sweet and tart and this paleo/scd key lime pie definitely fits the bill. There is something so special about the combination of a creamy lime filling and buttery graham crust, I can never get enough!

Perfect for summer, this scrumptious berry pie has both paleo and vegan options. My husband loves a slice for breakfast-just like a poptart but with extra filling! 😉 This no churn cherry vanilla bean ice cream is so rich and dreamy and is magical with our grain-free waffle cones! (You’ll find those just below.) This is such a great treat to have after grilling, guaranteed to bring smiles to everyone’s faces.

These grain-free waffle cones are so good, we even eat them without the ice cream! So much fun to make and decorate, get the whole family involved!

I loooove these lemon curd blondies . They taste like a super scrumptious lemon bar in blondie form. More delicious than I can describe!! It’s also a simple 1 bowl recipe, can’t beat that!

I can’t wait for you to make these crab cakes!! I grew up on the east coast and I would have married crab cakes if I could have! This is my grain-free take on the Maryland lump variety and they go so well with the twice baked potatoes you’ll see below.

These twiced baked potatoes are a treat as a meal with a salad or a side to chicken, steak or crab cakes! Not a jalapeño lover? Add bacon or onion instead!

Happy Baking, Enjoy The Summertime Eats!😊
Print
Paleo Cherry Chocolate Blondie Bars
- Total Time: 55 min
- Yield: 8-10 blondies 1x
Ingredients
- 3 cups almond flour
- 1 cup arrowroot starch (Bob’s Red Mill)
- 1/4 teaspoon baking soda
- 1/4 teaspoon salt
- 5 tablespoons ghee or Vegan Earth Balance Butter or Coconut Spread
- 1/2 cup honey or maple syrup
- 1/4 cup almond milk
- 1 1/2 tablespoons vanilla extract
- 1 1/2 teaspoons molasses
- 3/4 cup Enjoy Life Chocolate Chips or Hu Kitchen makes great paleo chocolate.
- 2/3 cup fresh cherries, chopped and pitted (or unsweetened dried cherries)
Instructions
- Preheat oven to 350 degrees.
- In a large bowl, whisk together almond flour, arrowroot starch, baking soda and salt. Add melted butter, honey, almond milk, vanilla extract, molasses and combine well. It will be like a loose dough.
- Now mix in your chocolate chips and cherries and incorporate evenly. Press loose dough into a parchment paper lined 8×8 baking pan and bake at 350 degrees for about 40 minutes. (They should still be a bit soft, like brownies when they are done. They will firm up during the cooling process).
- Remove and place pan on a cooling rack and let blondies cool for 15 FULL minutes before slicing. Store any leftovers in an airtight container. Enjoy!!
- Prep Time: 15 min
- Cook Time: 40

SCD + Paleo Key Lime Pie
- Total Time: 30 min prep, chill for several hours
Ingredients
- GRAHAM CRUST:
- 2 cups almond flour (Bob’s Red Mill)
- 1 tablespoon coconut flour
- 2 teaspoons cinnamon
- 1/4 teaspoon baking soda
- 1/4 cup honey
- 1 egg yolk
- 3 tablespoons melted butter, divided. (Ghee, or coconut oil will also work well).
- 1 tablespoon coconut milk (full fat, Trader Joe’s Organic is additive-free and BPA-free).
- 1 teaspoon vanilla extract
- THE FILLING:
- 1 tablespoon gelatin
- zest of 3 limes
- 1/8 teaspoon salt
- 2 cups coconut milk (full fat, Trader Joe’s Organic is additive-free and BPA-free).
- 1/2 cup honey
- 1/2 cup key lime juice (regular lime juice is fine)
- 3 egg yolks
- COCONUT WHIPPED TOPPING:
- The solid cream from two cans of chilled coconut milk (view instructions for details)
- 1/8 teaspoon vanilla extract
- 1/4 teaspoon gelatin
- a drizzle of honey or tiny pinch of stevia
Instructions
- Preheat oven to 350 degrees
- Start with your graham crust first: In a large bowl, whisk together almond flour, coconut flour, cinnamon and baking soda. Add honey, egg yolk, 1 tbsp melted butter, coconut milk and vanilla extract. Combine until dough forms–dough will be sticky. Form dough into a ball and let it rest for a few minutes.
- Spread dough onto a parchment paper lined baking sheet. You’ll want to spread it fairly thinly into a square or rectangle so it will cook evenly– think of it as a large cookie. Bake it at 350 degrees for about 15-18 minutes. Edges will brown, the middle will still be a bit soft. Place pan on cooling rack and let cool completely, it will firm up somewhat during the cooling process.
- Once the “cookie” is cooled completely, break it up into pieces and transfer them into food processor. Pulse until you have fine crumbs. Add remaining butter, pulse again until evenly combined. Press and spread graham mixture into the pie pan, working it up the sides of the pan as well. Use a fork to poke holes in the bottom of the crust. Bake at 350 degrees for 18 minutes and cool completely.
- While your crust is cooling, you can make your filling: In a large dry bowl, whisk together gelatin + salt. Add lime zest, whisk again. Then slowly add in your coconut milk while whisking, followed by honey, lime juice + egg yolks. Blend until evenly combined. (I do this by hand, but hand mixer is fine as well).
- Pour liquid mixture into a medium sized pot and cook on medium heat, stirring continuously until it reaches a boil. Let it boil for about 5-10 seconds then remove from heat. It will not be thick at this stage. Let liquid cool for 30 minutes-stirring occasionally. Pour the cooled liquid filling through a strainer into your prepared pie pan. Then immediately place it into the refrigerator to firm and chill overnight. (Cover very loosely with aluminum foil, creating a dome so it does not touch the filling and do leave air vents). For quicker set up, place pie carefully in freezer, it will be set up in 3-4 hours. *(At this point you’ll want to place two cans of coconut milk in the fridge to chill along with a small mixing bowl-this will make your coconut topping more firm).
- Make your coconut whipped topping right before serving the pie. Open the two cans of coconut milk and remove just the cream on top, being careful not to transfer liquid a long with it. Place the cream in your chilled mixing bowl. Sprinkle 1/4 tsp of gelatin overtop and add a very small drizzle of honey and 1/8th tsp of vanilla extract. Blend for just 10-15 seconds, over blending tends to loosen the cream. Place in piping bag with star tip or spoon a dollop on each pie serving. Serve and enjoy! Cover and refrigerate leftovers.

Summer Berry Pie
- Total Time: 1 hr 15 min
- Yield: 8 slices 1x
Ingredients
- CRUST
- 2 2/3 cups almond flour (Bob’s Red Mill)
- 1 cup tapioca starch
- 1 teaspoon salt
- 1/2 cup butter, cubed (Earth Balance for Vegan, Ghee for Paleo version)
- 1/3 cup cold water
- (*2 tbsp full fat coconut milk for “egg wash” to be brushed on right before baking)
- FOR THE FILLING:
- 5 cups fresh berries (any berries you prefer, frozen are fine, just defrost first.)
- 1.5 tablespoon fresh lemon juice
- 1 teaspoon vanila extract
- 1/2 cup sugar (or coconut sugar)
- 3.5 tablespoons potato starch (not potato flour)
Instructions
- FOR THE FILLING:
- Remove strawberry stems and cut into slices. Place sliced strawberries in a large bowl. Then add in raspberries, blackberries and blueberries.
- Add lemon juice and vanilla extract to berry mixture and toss until evenly combined.
- In a separate, small bowl, whisk together the sugar + potato starch.
- Pour this dry mixture over the berries and toss again. Set aside.
- FOR THE CRUST:
- Whisk together almond flour, potato starch and salt.
- Cut butter into flour using pastry cutter or fork.
- Add cold water and start to work it into the dough. I prefer to use my hands, but you can use a food processor if desired.
- Slowly add the remaining water until dough has formed. It will be stickier and more pliable than traditional dough–similar to play-doh.
- Press half of the dough into the pie pan and work dough up the sides and around the edges. You may find it easier to work with the dough if you dip your fingers into water first. I keep a small cup by my working station. (Alternatively, you can roll the dough in-between two pieces of parchment paper, remove top layer and turn over onto pie pan and make any necessary adjustments.
- Pour berry filling into prepared pan.
- Roll out the remaining half of the dough in between two pieces of parchment paper. (And not too thin, you want a little thickness for the top layer, it will be easier to work with).
- Peel off top layer of parchment paper. Swiftly and carefully turn rolled dough onto pie. Peel back the paper and trim excess. It’s ok if there are cracks, they can be fixed by dipping your fingers into water and mending.
- Make a few vent holes and brush with a bit of coconut milk, this will act like an egg wash. Sprinkle the top with coarse sugar, flute edges and carefully place pie into oven at 350 degrees for 45-60 minutes (my oven takes closer to 60 minutes, but start checking in at 30 minutes). I like to place aluminum foil or a pie crust shield around the edges at this point to avoid outer edge burning.
- Let pie cool before serving as the filling will set during the cooling process. Enjoy!!
- Prep Time: 30 min
- Cook Time: 45

No Churn Cherry Vanilla Bean Ice Cream
- Total Time: 0 hours
- Yield: 8-10 scoops 1x
Ingredients
- 2 1/4 cups organic heavy whipping cream
- 20 ounces frozen cherries, thawed and drained. (Save juice)
- 4 egg yolks
- 1/3 cup honey
- 2 tablespoons cherry juice (from the frozen cherries)
- 2 teaspoons vanilla extract
- 1 vanilla bean, split and seeded (or an extra tsp of vanilla extract)
- 1/4 teaspoon guar gum (Bob’s Red Mill) (Can be omitted if necessary, see Tips in post above).
- 1/8 teaspoon cherry extract (optional)
- 1/8 teaspoon salt (optional)
Instructions
- In a large mixing bowl, add 2 cups of heavy whipping cream. Sprinkle 1/4 tsp guar gum overtop evenly. Blend with hand mixer on high for about 2 minutes or until you see firm peaks form. Set bowl aside.
- Drain your thawed cherries, but save the cherry juice and set them aside.
- Then separate 4 eggs, keeping just the yolks for this recipe. Whisk yolks briskly for about a minute in a medium sized bowl and set them aside as well.
- In a medium size pot, add 1/3 cup of honey, 1/4 cup of heavy cream, vanilla extract, vanilla bean paste and salt. Bring to a simmer, stirring constantly. Keep at a simmer while stirring for about a minute, then remove from heat. Now, you will temper the eggs–this means you will be slowly raising the temperature of the egg yolks without scrambling them. (Not as hard as it sounds, promise!)
- While whisking your egg yolks, add just a spoonful of the heated honey mixture and combine well. Then slowly start drizzling the hot mixture into the yolks, a little bit at a time while whisking briskly. Once it is all mixed in, leave it to cool COMPLETELY to room temperature.
- After your egg/honey mixture is completely cooled, slowly blend it into your whipped cream with a hand mixer. Then add 2 tbsp of your cherry juice and 1/8 tsp of cherry extract.
- Finally, blend in your cherries and pour mixture into a chilled 9x5x3 metal loaf pan. Cover and freeze for about 4.5-5 hours, it will still be a touch soft and easy to serve at this point. Freeze another few hours for it to become completely solid. Serve and enjoy!
- Prep Time: 25 min
- Cook Time: freeze 5 hours

Grain-Free Waffle Cones
- Total Time: about 30 minutes
- Yield: 8 cones 1x
Ingredients
- 1 1/2 cups almond flour (Bob’s Red Mill)
- 3/4 cup potato starch (not potato flour) or 2/3 cup tapioca starch
- 1/8 teaspoon salt
- 1/2 cup +1 tbsp milk (or almond milk)
- 2 1/2 tablespoons butter, melted (or vegan Earth Balance Spread)
- 2 1/2 tablespoons honey or maple syrup
- 1 egg
- 2 teaspoons vanilla
- chopped nuts for garnish, link to gf sprinkles in post.
- Naturally sweetened chocolate topping in “tips” section in above post.
Instructions
- In a large bowl, whisk together the almond flour, potato starch and salt.
- Add egg, melted butter, milk, honey and vanilla extract and combine well until batter is smooth. Let batter sit for 2-3 minutes (it will thicken slightly) and mix once again.
- Pour 1/4 of a cup of batter onto preheated waffle cone maker. Close top and press down to ensure batter spreads near to the edge–but not over the edge. I add pressure to the top of the lid for the first 30 seconds to get a nice browning on the cone.
- Wait approximately 2 minutes and lift top. Carefully remove waffle cone and shape it around your cone roller and hold it in place for about a minute and it will harden and retain the shape. Careful not to burn your hands-heat gloves work beautifully if you have them. Set the cone on parchment paper and allow it to fully harden. Be prepared for the first cone to serve asa test to get a feel for the waffle cone maker.
- Dip your cooled cones in chocolate + sprinkles or toasted nuts. I pour a bit of chocolate in the bottom to create a seal and a nice surprise for the last bite!
- I recommend serving these cones the day of, homemade waffle cones have a tendency to soften- particularly in humid weather. But it’s the perfect excuse for seconds!!
- Prep Time: 15 min
- Cook Time: 2 minute intervals

Grain-Free Lemon Curd Blondies
- Total Time: about an hour
- Yield: 9-12 squares 1x
Ingredients
- 2 1/4 cups almond flour (Bob’s Red Mill)
- 1/4 cup tapioca starch
- 1/2 cup + 1 tbsp sugar
- Zest of 2 lemons
- 1/2 teaspoon baking soda
- 1 egg + 1 yolk
- Juice of 1 large lemon (seeded)
- 1/4 cup melted butter
- 1/2 tablespoon milk
- 3/4 cup white chocolate chips
- 1/3 cup slivered almonds (optional)
- *optional: melted white chocolate chips to drizzle on top of baked blondies
Instructions
- Preheat oven to 350 degrees
- In a large bowl, whisk together almond flour, tapioca starch, sugar and baking soda. Add lemon zest and whisk again.
- Add egg and additional egg yolk, lemon juice, melted butter, milk and combine until smooth. Batter will be very thick.
- Add white chocolate chips, almond slices into batter and incorporate evenly.
- Spread batter into a parchment paper lined 8 x 8 baking dish. (Batter rises quite a bit during baking).
- Bake at 350 degrees for 30 minutes uncovered, then secure a sheet of foil over the top and continue baking for another 15-20 minutes. You want the middle to be soft, it will firm up during the cooling process in the same manner a batch of brownies would (and it will be much more moist and delicious this way).
- Let cool in the pan for 10 minutes and transfer to freezer for 25- 30 minutes before slicing. They will be perfectly chilled and ready to serve!
- For the white chocolate drizzle, melt down 3/4 of a cup of chips in a double broiler with 2 tablespoons coconut oil. Drizzle over top and add toasted almonds. Place in freezer for 3-5 minutes for the white chocolate to harden. Enjoy!
- Prep Time: 15 min
- Cook Time: 45-50 min

Grain-Free Crab Cakes
- Total Time: 1 hr
- Yield: 8 crab cakes 1x
Ingredients
- 1 pound fresh crabmeat (preferably lump)
- 1 cup SCD Bread Crumbs (or use our paleo no bread crumb “quick flour mix” version, see below)
- 1 egg
- 1/3 cup mayonnaise
- 1 1/2 teaspoons fresh lemon juice
- 1 teaspoon dijon mustard
- 1 teaspoon Worcestershire sauce (Lea and Perrin’s Original is Gluten-Free). Eliminate for SCD version.
- 1/4 teaspoon Tabasco sauce
- 1/4 teaspoon Old Bay Seasoning (+ more for dusting)
- 1/4 teaspoon Italian Seasoning
- 1/8 teaspoon pepper
- 1 tablespoon chopped fresh parsley
- 1 tablespoon butter (or vegan butter, ghee or just olive oil work as well).
- 2 tablespoons olive oil
*Quick Flour Mix: Use in place of bread crumbs. In a small bowl, whisk together 1/3 cup almond flour, 1.5 tbsp of tapioca starch, 2 tsp of Italian seasoning and a tiny pinch of salt. Use this mixture in the recipe in place of the bread crumbs. (It may seem like a small amount of flour compared to the bread crumbs, but it will bind them beautifully).
Instructions
- Preheat oven to 400 degrees
- Rinse and drain crabmeat. Dry with paper towel to absorb excess water. Set aside.
- In a large bowl, thoroughly combine mayo, mustard, egg, Worcerstershire, Tobasco and lemon juice. Add in Old Bay seasoning and fresh parsley and mix again.
- Pour crabmeat into egg/mayo/spice mixture and combine thoroughly.
- Add bread crumbs (or our quick flour mix-see post above for ingredients) and combine well.
- Line a baking sheet tray with parchment paper. Shape crab cakes and place onto parchment paper. Refrigerate for 1/2 hour.
- In a small dish, combine pepper, Italian seasoning and a pinch of Old Bay seasoning. Sprinkle this mixture lightly over the tops of the crab cakes. Carefully turn them over and sprinkle the other side as well. This will make for a flavorful crust.
- Heat a large pan with your butter and olive oil on medium heat. When butter becomes frothy, lower crab cakes into pan carefully by spatula to brown on both sides, about 2 minutes each side. (Golden in color).
- After they have been been lightly browned, transfer cakes back to parchment paper lined baking sheet and place in the oven at 400 degrees to cook through–about 15 minutes.
- Remove from oven and transfer to plate with spatula. Serve with lemon wedges and sauces. (Tartar, Cocktail or Louis sauce are our favorites). Crab cakes can be prepped and stored in the fridge the morning of and cooked later in the afternoon/evening. Enjoy!!!
- Prep Time: 30 min
- Cook Time: 30 min

Jalapeño Twice Baked Potatoes
- Total Time: 85 min
- Yield: 7 servings 1x
Ingredients
- 4 large potatoes
- 1/3 cup softened cream cheese (Kite Hill for dairy-free/vegan cream cheese + sour cream).
- 1/3 cup sour cream (extra for topping)
- 3 tablespoons butter (Earth Balance for dairy-free/vegan)
- 3/4 cup shredded cheddar cheese, more for topping. (Shredded Daiya Cheese for dairy-free/vegan)
- 2 jalapeños, seeded and diced
- 1/2 teaspoon paprika
- salt + pepper to taste
Instructions
- Preheat oven to 375 degrees
- Wash then dry potatoes. Use a fork to pierce each potato so steam can escape. Bake them on a cookie sheet at 375 for 1 hour.
- Wait a few minutes after they’re out of the oven. Use two oven mitts so you don’t burn your hands–slice each potato lengthwise.
- Use a large bowl to mix your potatoes. Scoop out the insides of each half but make sure to leave enough shell so they don’t fall apart, you will need them sturdy enough to hold the filling.
- Add the butter to your potatoes before mashing–let it melt a bit. Then use a hand mixer (you can mash by hand if preferred) on medium speed to smooth potatoes. Add your softened cream cheese + sour cream and blend again, do not over-mix. Add cheese and again, combine. Finally stir in diced jalapeño. Add salt and pepper to taste.
- Place the potato shells on the cookie sheet and fill up 7 of the halves (we always forgo one of them so the others have more filling). Place additional shredded cheese overtop.
- Return to oven for about 25 minutes. Serve hot with a dollop of sour cream and paprika. Enjoy!
Notes
*Potatoes vary in size, feel free to add more sour cream and cheese to taste, but make sure to start with the recipe’s measurements. You can always add more, but you can’t take it back out! 😉
- Prep Time: 20 min
- Cook Time: 25 min


Wow!! Such tempting choices, they all will be on the summer menu— for sure!!!!❤️
Aw thank you so much! I hope you enjoy the recipes!
I love your beautiful round-up of summer food! Those paleo chocolate cherry blondies had me drooling from the start and then the rest! Pinning! xo
Aw haha thank you dear Kim!! That is so kind of you, the blondies are my favorite too!! 😀